







DIY Custom Mugs with POSCA: The Ultimate Australian Guide (2026)
Have you ever spent hours meticulously hand-painting a gift, only to watch your hard work flake away after a single wash? It's incredibly frustrating when a creative project doesn't stand the test of time, especially when you've used genuine paint pens. Most Australian hobbyists and teachers worry about ink smudging during the painting process or getting the oven temperature wrong when it's time to set the ink. We understand that you want a result that looks professional and feels durable.
This guide will show you exactly how to master diy custom mugs with POSCA so your vibrant, personalised designs stay put. As a specialist Australian resource, PoscART is here to help you explore the clean, create, and cure method using genuine POSCA markers. We'll cover everything from selecting the right tip sizes for fine details to the precise temperatures needed for a professional finish. You'll gain the confidence to transform a ceramic surface into a lasting masterpiece.
Key Takeaways
- Thoroughly clean your ceramic surface with soapy water or rubbing alcohol to remove oils and fingerprints that can prevent the paint from adhering properly.
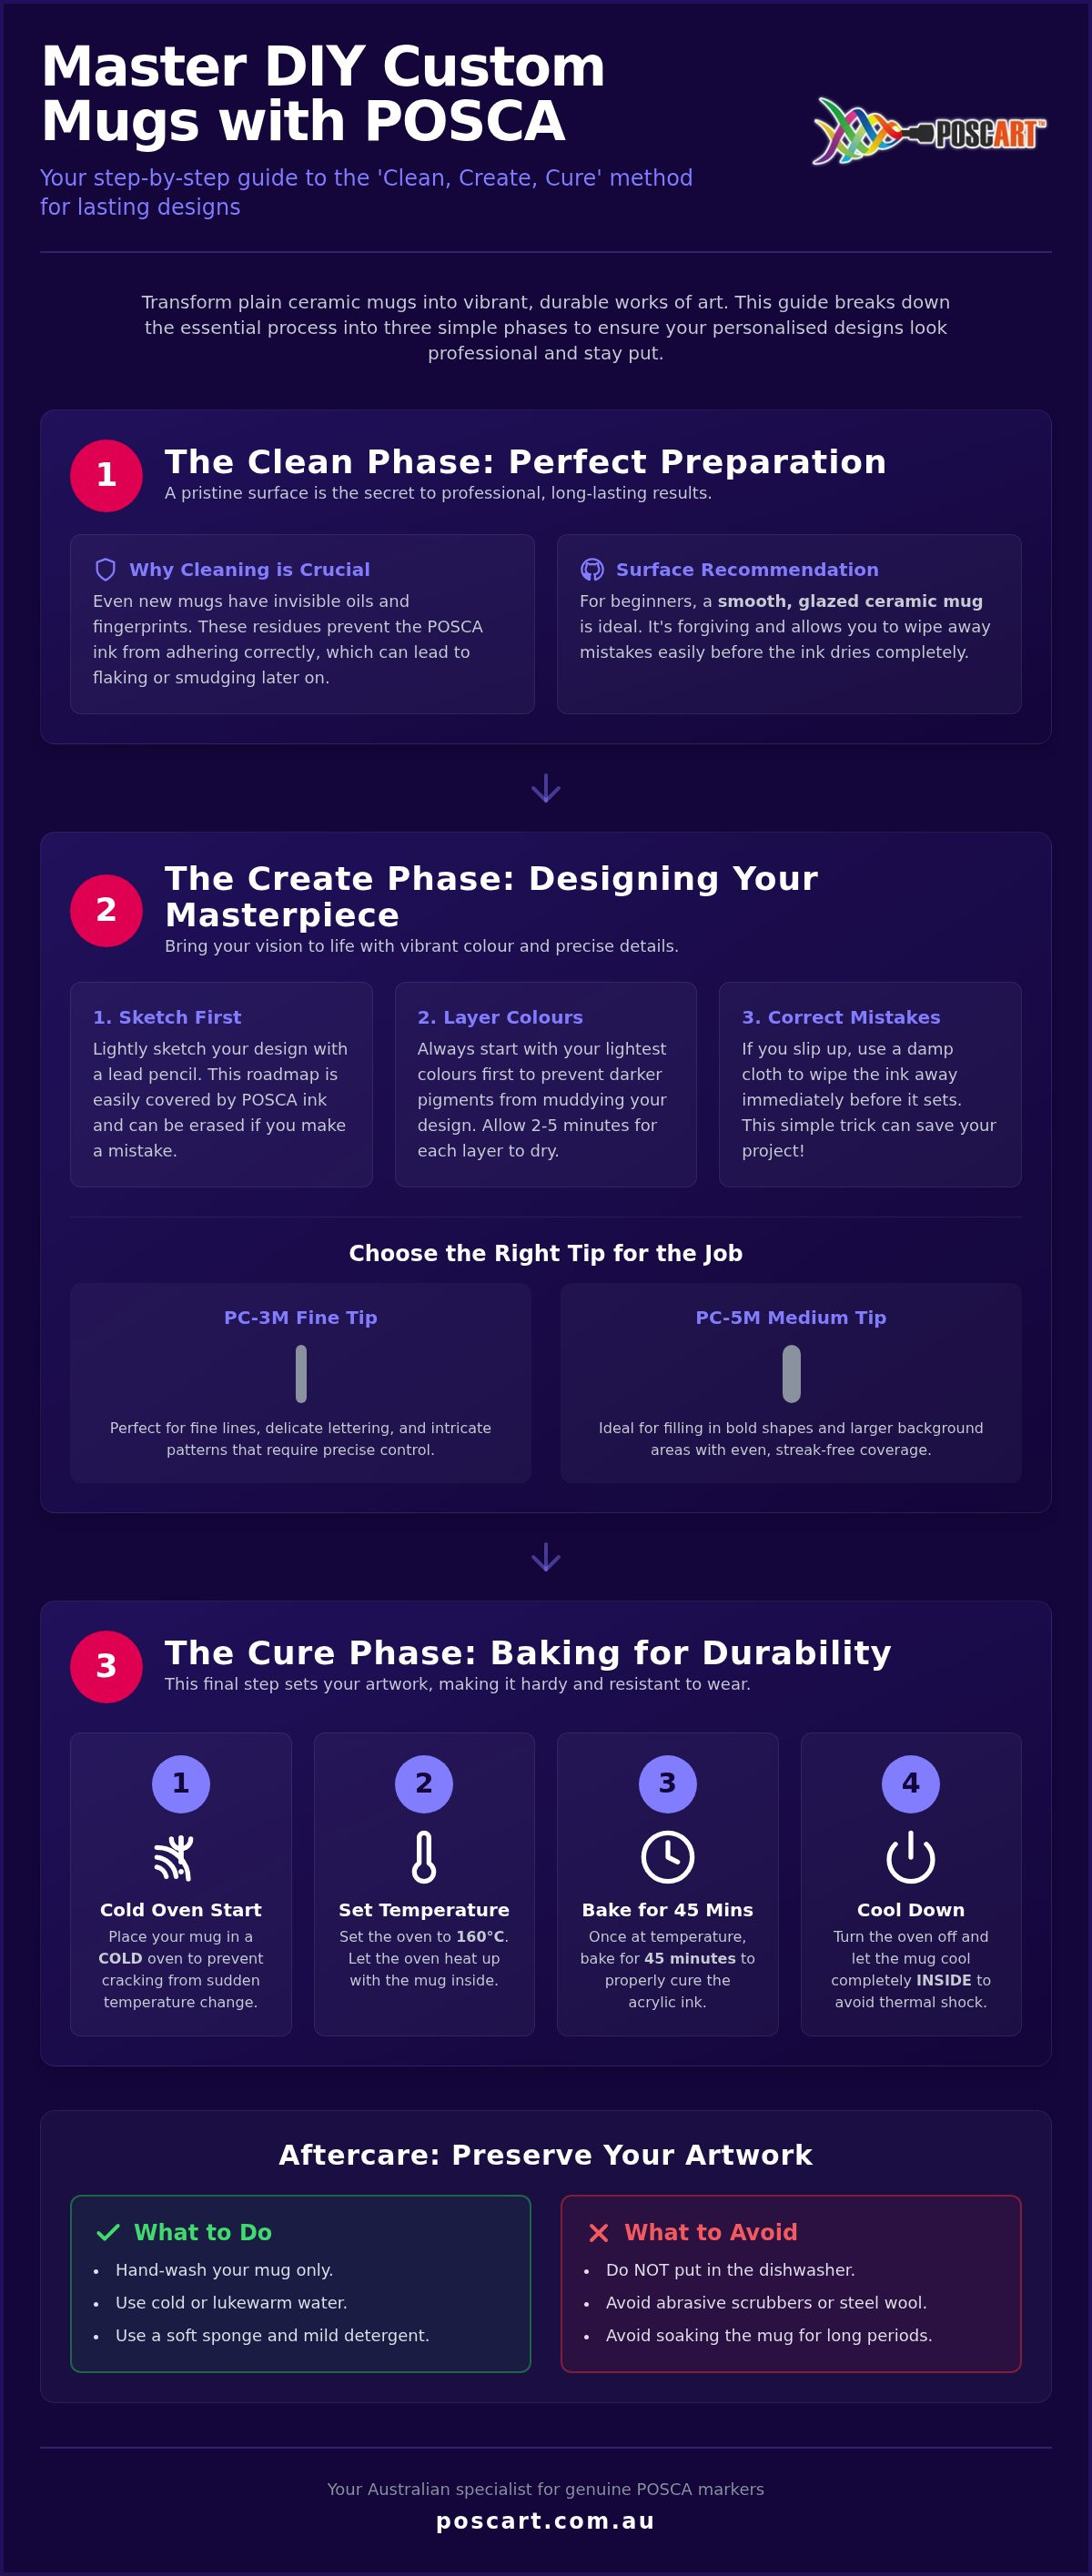
- Master the process of diy custom mugs with posca by sketching your design in lead pencil first and layering your lightest colours before moving to darker pigments.
- Ensure a durable finish by placing your mug in a cold oven and baking it at 160°C for 45 minutes, allowing it to cool completely inside the oven.
- Preserve your personalised artwork by washing the finished piece in cold water only, as heat-cured POSCA designs are not suitable for the dishwasher.
Selecting Your POSCA Markers and Prepping the Surface
Authentic POSCA markers are the gold standard for ceramic projects. Their high opacity and water-based acrylic ink ensure your colours pop against the mug's surface. Using genuine markers from a specialist like PoscART guarantees you won't struggle with thin, watery coverage. This is especially vital when you're creating diy custom mugs with posca, as the paint needs to sit firmly on the glaze without running or smudging.
Preparation is the secret to a professional finish. Even a brand-new mug carries invisible oils from fingerprints that prevent ink from adhering. Use a lint-free cloth with rubbing alcohol or warm, soapy water to thoroughly clean the ceramic. Beginners should stick to smooth, glazed mugs. These surfaces are more forgiving, allowing you to wipe away mistakes before the ink dries. Matte or unglazed ceramics are more absorbent, making it harder to correct your work during the painting process.
Your Essential Materials Checklist:
- Genuine POSCA markers in your favourite colours
- A clean, glazed ceramic mug
- A lint-free cloth and rubbing alcohol
- A standard lead pencil for sketching your initial design
Choosing the Right Tip Sizes for Your Design
Selecting the correct nib size is a simple way to organise your creative workflow. For fine lines, delicate lettering, or intricate patterns, the POSCA PC-3M Fine Bullet Tip provides the necessary control. It's the perfect choice for detailed illustrations. When you need to fill in bold shapes or larger background areas, the POSCA PC-5M Medium Bullet Tip ensures even, streak-free coverage. Having a mix of sizes allows you to layer your diy custom mugs with posca effectively without losing the fine details of your artwork.
The DIY Process: Designing and Painting Your Custom Mug
Once your surface is clean, start by lightly sketching your design with a standard lead pencil. This is a crucial step that many beginners skip, yet it's the foundation of the "Create" phase. Graphite lines provide a helpful roadmap and are easily covered by the opaque POSCA ink. If you make a mistake at this stage, you can simply rub it out and try again without wasting any paint or ruining the finish of your ceramic.
When you're ready to paint, always start with your lightest colours first. This prevents darker pigments from muddying your lighter shades during the layering process. Because the ink is water-based and odourless, it's a comfortable experience for long crafting sessions at home or in the classroom. In our varied Australian climate, each layer typically takes roughly 2-5 minutes to dry completely. It's vital to wait for this drying period before adding finer details on top to ensure crisp, clean lines. If a slip of the hand occurs, keep a damp cloth nearby to wipe away any "oops" moments immediately before the ink sets. This simple trick saves you from having to restart the entire project. If you're inspired by the process of creating custom designs and want to see how professional branding is handled on a larger scale, Signarama is a great example of how custom commercial signage can bring a brand's vision to life.
Creative Design Ideas and Aussie Inspiration
Take inspiration from our unique landscape by incorporating Australian botanical themes. Delicate Golden Wattle or Eucalyptus leaves look stunning when rendered in earthy green and yellow tones. For a more contemporary look, try modern geometric patterns or personalised hand-lettering to create a thoughtful gift. You can also explore various POSCA pen techniques like stippling or dotting to add depth and texture to your artwork. These methods help your diy custom mugs with posca stand out as truly unique pieces. If you're unsure which colours work best together or need help selecting a palette, feel free to reach out for creative advice from our specialist team.
Curing and Caring for Your POSCA Masterpiece
Setting your ink is the final, vital step in the "Cure" phase of your project. Place your finished mug into a cold oven before turning it on. This gradual heating ensures even curing and prevents the ceramic from cracking. Set your oven to 160°C. Once the oven reaches this temperature, bake the mug for 45 minutes. When the timer goes off, turn the oven off but leave the mug inside. It's essential to let the ceramic cool completely before removing it. Moving it too quickly can cause thermal shock, which might ruin both your artwork and the mug itself. This precise thermal method is the secret to successful diy custom mugs with posca.
While curing makes your design hardy, it's not a green light for the dishwasher. High temperatures and abrasive detergents in modern machines will eventually strip the acrylic paint. For maximum longevity, hand-wash your personalised mugs with a soft sponge and mild detergent. Avoid using abrasive scrubbers or steel wool, as these can catch the edges of the ink and cause flaking. Remember that results vary depending on the specific glaze or coating of your ceramic. For a deeper look at how different materials react, check out our POSCA surface guide for detailed advice.
Post-Cure Maintenance and Longevity
Storing your artwork correctly is just as important as the painting process. To keep your diy custom mugs with posca looking vibrant, avoid clinking them against other crockery in the cupboard. Small scratches from storage can compromise the seal of the paint. Always use a gentle touch when cleaning, and your personalised masterpiece will remain a cherished gift or a staple of your morning routine for years to come. By treating your work with a little extra care, you'll preserve the professional finish you worked so hard to achieve.
Bring Your Creative Vision to Life
Creating diy custom mugs with posca is a rewarding way to turn everyday ceramics into meaningful gifts or unique home decor. By mastering the clean, create, and cure method, you ensure your vibrant designs survive more than just the first rinse. Remember that success starts with a spotless surface and ends with a patient, gradual cooling process in the oven. Using genuine markers from a specialist Australian POSCA retailer ensures the opacity and quality your artwork deserves.
As a family-owned and operated business, PoscART is dedicated to supporting your creative journey with express shipping available nationwide. Whether you're a teacher organising a classroom project or a hobbyist refining your technique, we're here to help you find the perfect tools for the job. If you have questions about specific surfaces or colour layering, please contact our expert team today for personalised advice. We can't wait to see the incredible masterpieces you create.
Frequently Asked Questions
Are POSCA mugs dishwasher safe after baking?
POSCA mugs are not dishwasher safe, even after the curing process. The high heat and aggressive detergents in a dishwasher will eventually cause the paint to flake or peel. To ensure your diy custom mugs with posca last for years, always wash them by hand using cold water and a soft sponge. Avoid abrasive scrubbers that might scratch the artwork.
What temperature do I bake my POSCA mug at in Australia?
You should bake your glazed ceramic mug at 160°C for exactly 45 minutes to set the ink. It's vital to place the mug in a cold oven and let it heat up gradually. Once the time is up, turn the oven off and leave the mug inside to cool completely. This prevents thermal shock and ensures a professional, durable finish.
Can I fix a mistake on my mug after I have already baked it?
It is very difficult to fix a mistake once the mug has been heat-cured, as the baking process is designed to fix the ink to the surface. If you've already baked your diy custom mugs with posca, you might be able to carefully scrape away small errors with a fine blade, but this risks scratching the glaze. Always check your design thoroughly before curing.
Is POSCA ink food safe for the inside of the mug?
POSCA ink is not considered food safe, so you should never paint on the inside of the mug or around the rim where lips touch. Keep your creative designs on the exterior body and handle only. While the ink is non-toxic and water-based, it isn't formulated for direct contact with food or drink, so safety should always come first.
General Information
This article is provided as general information only to help customers compare and choose POSCA markers, acrylic markers, art supplies, creative tools and related products. Product details, colours, finishes, surface suitability, availability, pricing and usage results may vary. Always check the individual product page, manufacturer information, age guidance, surface instructions and safety recommendations before purchasing or using a product.