







How to Seal POSCA Paint: Guide to Protecting Your Artwork
What if the hours you spent perfecting an intricate design on a glass vase or plastic phone case could be undone by a single accidental scratch? It's a common fear for many Australian artists when they first pick up a set of acrylic markers. You've likely felt that sinking feeling when a beautiful piece starts to peel or when a varnish makes your vibrant colours run into a muddy mess.
We know that protecting your creativity is just as vital as the act of making it. In this guide, you'll learn exactly how to seal posca paint using professional techniques and the right products for every surface. From choosing between spray and brush-on sealers to mastering the curing process, we'll help you secure a durable finish. You'll gain the confidence to ensure your PoscART creations remain resistant to UV fading and physical wear.
Key Takeaways
- Understand the critical difference between touch-dry paint and a fully cured finish to ensure your artwork remains crisp and smudge-free.
- Identify which water-based sealers are compatible with your paint pens to avoid unwanted chemical reactions or colour bleeding.
- Learn the professional spray techniques for how to seal posca paint on smooth surfaces like glass and PVC for a permanent, scratch-resistant result.
- Tailor your finishing method to suit the absorbency of your material, whether you are working with porous timber or decorative terracotta.
Preparation and Curing: The Secret to a Smudge-Free Finish
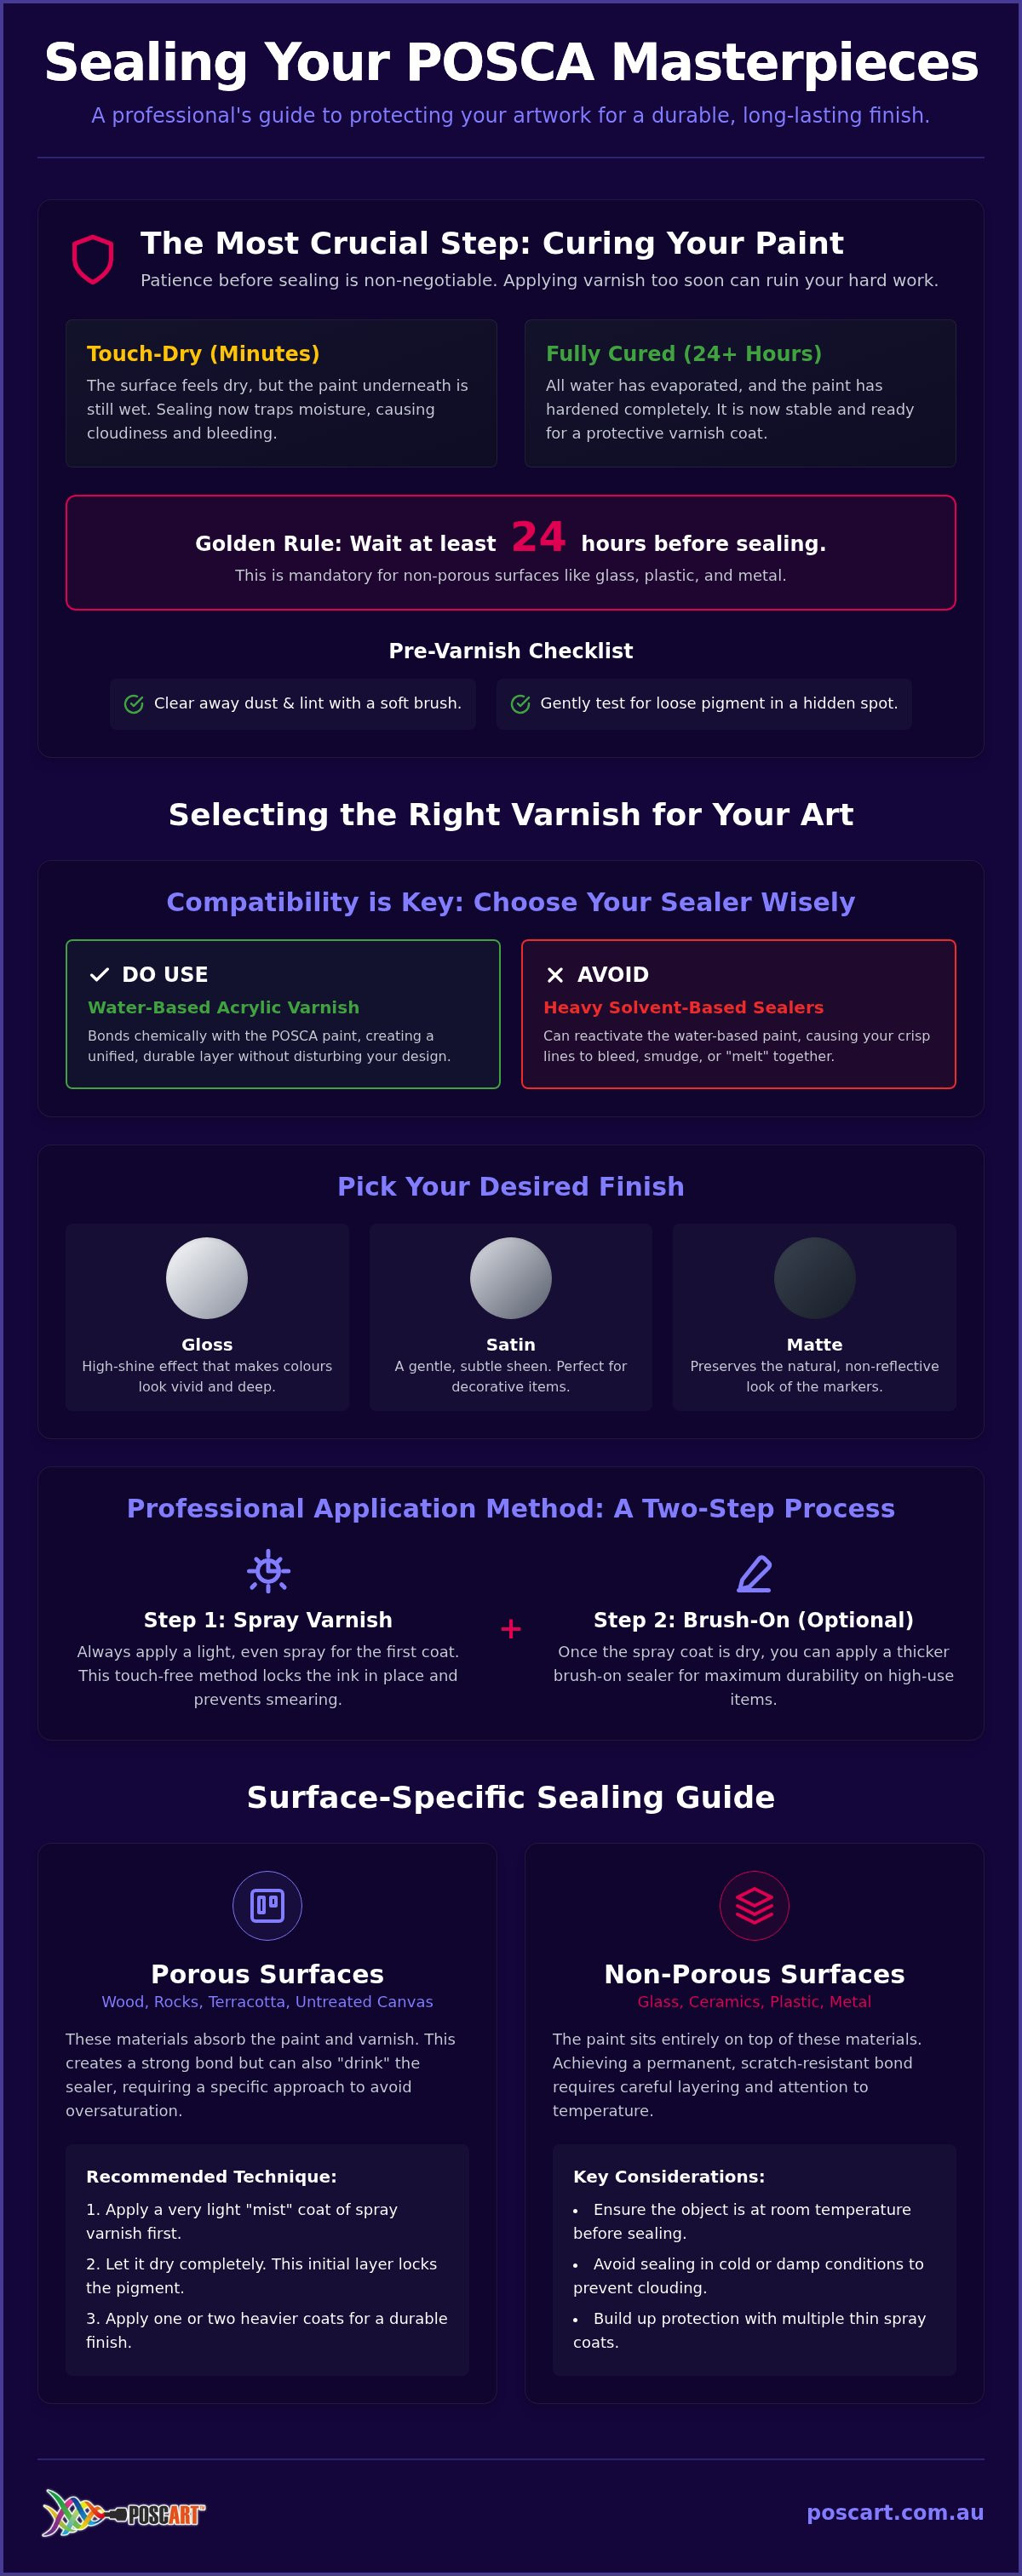
Patience is your most valuable asset when learning how to seal posca paint. While the ink feels dry to the touch within minutes, it hasn't truly bonded to the surface yet. This is vital because POSCA markers use a high-pigment acrylic paint that needs time for all water to evaporate. Applying sealer too early risks trapped moisture clouding the finish or causing detailed line work to bleed across your work.
Curing is different from drying. A touch-dry surface is merely the top layer forming a skin. Fully cured means the chemical structure has hardened and stabilised. On non-porous materials like plastic or metal, this process takes longer because the paint cannot soak into the substrate. Skipping this wait time often leads to the varnish beading on the surface or peeling off in sheets later.
Essential Steps Before You Apply Varnish
Before reaching for your spray can, follow these preparation steps to ensure a professional result:
- Wait at least 24 hours: Give the paint a full day to cure. This is mandatory for smooth surfaces where the paint sits on top of the material rather than soaking in.
- Clear away debris: Use a soft, dry brush to flick away any dust or lint. Even a tiny hair can create a permanent bump under your sealer.
- Test for loose pigment: Lightly dab a small, hidden area with a clean microfibre cloth. If colour transfers to the cloth, the paint isn't ready for sealing.
Removing oils and fingerprints is also essential. If you handled the object extensively while drawing, those natural oils can prevent the varnish from sticking properly. For more specific advice on different materials, you can check the PoscART FAQ to see how your chosen surface behaves.
Selecting the Right Varnish for Your POSCA Art
Choosing a sealer involves more than just picking a brand. Because POSCA markers are water-based, the chemistry of your varnish matters. Many heavy solvent-based aerosols can reactivate the paint, causing your crisp lines to bleed or melt. You need a water-based acrylic varnish to ensure the sealer bonds with the paint rather than fighting it.
Your choice of finish depends on the desired aesthetic. Gloss varnishes create a high-shine effect that makes POSCA colours look incredibly vivid. Matte finishes are perfect for preserving the markers' natural, non-reflective appearance. If you want something in between, satin offers a gentle sheen that works well for decorative home items.
Spray vs Brush-On: Which Should You Use?
Spray varnishes are the go-to choice when figuring out how to seal posca paint without ruining your work. They provide an even, touch-free layer that is essential for the first coat. This method prevents the marker ink from smearing, which is a common risk when using a brush directly on the paint.
Once you've applied a fine spray layer and let it dry, you can follow up with a brush-on sealer for a thicker, more durable protective coat. This two-step process is a great way to build up a resilient shield on functional items like coasters or phone cases.
Always prioritise UV-resistant formulas. The Australian sun is notoriously harsh on pigments. A UV-stable varnish prevents your artwork from fading over time, keeping those bright tones fresh for years. If you're unsure about surface compatibility for a specific project, you can check our common questions for more detailed guidance.
Surface-Specific Sealing Techniques for Australian Artists
Australia's diverse climate presents unique challenges for artists. Whether you're working in the humid tropics of Queensland or the dry heat of the Red Centre, your drying and sealing times will shift. High humidity can trap moisture between the paint and the sealer, leading to a cloudy or "blushing" effect. Conversely, extreme heat can cause the varnish to dry too quickly, resulting in an uneven texture. Always aim to apply your sealer in a shaded, well-ventilated area at room temperature to ensure a professional bond.
Porous materials like timber and terracotta are naturally more forgiving because they absorb the pigment. However, they can also "drink" your varnish. When learning how to seal posca paint on these surfaces, start with a very light "mist" coat. This locks the paint in place without oversaturating the material. Once that initial layer is dry, you can apply a heavier coat for a durable finish.
How to Seal POSCA on Common Materials
Non-porous surfaces like glass and PVC require more care since the paint sits entirely on the surface. Achieving a permanent bond here is all about layering and temperature control.
- Wood and rocks: Apply a light first coat to 'lock' the pigment before adding a heavier protective layer. This prevents the wood grain from swelling or the paint from bleeding into the pores.
- Glass or ceramics: Ensure the surface is room temperature to prevent the varnish from clouding. Avoid sealing these items in cold, damp garages or sheds.
- Plastic and PVC: Use several thin spray layers rather than one thick one. This prevents the solvent in the spray from sitting too long on the paint and causing it to soften.
For detailed prep advice for every medium, refer to our What Surfaces Do POSCA Pens Work On? guide. Mastering how to seal posca paint on these challenging surfaces ensures your hard work doesn't scratch off during everyday use.
Preserve Your Creative Legacy
Protecting your artwork ensures that your vibrant designs stand the test of time. By allowing a full 24 hours for curing and selecting a compatible water-based spray varnish, you prevent the frustration of smudges or fading colours. Mastering how to seal posca paint gives you the freedom to experiment on everything from smooth glass to textured timber with total confidence in the final result. Remember to work in a shaded, room-temperature environment to get the best out of your sealant.
As a specialist Australian family-owned business, we're here to support your artistic journey with fast national shipping and expert advice for teachers and hobbyists alike. If you're ready to start your next project, you can stock up on genuine POSCA markers and accessories at PoscART. We're excited to help you bring your next colourful vision to life.
Frequently Asked Questions
Will sealing my POSCA art make it dishwasher safe?
Sealing your POSCA art doesn't make it dishwasher safe. The intense heat and high pressure water of a dishwasher will eventually cause the paint to peel or chip, even with multiple coats of varnish. For items like mugs or plates, we recommend gentle hand washing with a soft sponge and mild detergent to ensure your designs stay vibrant for as long as possible.
Can I use hairspray to seal my POSCA markers?
You should avoid using hairspray to seal your POSCA markers as it isn't designed for acrylic paint. Hairspray can become sticky over time, attract dust, and often turns yellow as it ages. It lacks the UV resistant properties found in dedicated art varnishes. For a professional finish, stick to water based acrylic spray sealers that are specifically formulated to protect paint pens.
How do I prevent the varnish from making my paint bleed?
To prevent bleeding, the most effective method for how to seal posca paint is to apply a light spray varnish first. This "fixes" the pigment in place without the friction of a brush, which can drag paint across your work. Ensure the paint has cured for at least 24 hours before applying any sealer, as trapped moisture is a primary cause of smudging.
Do I need to seal POSCA paint if it's on paper or card?
Sealing is generally optional for paper or card because these porous surfaces absorb the paint, making it permanent once dry. However, applying a light fixative can protect your work from smudging during handling or fading from UV exposure. If you decide to seal paper, use a very light spray to avoid warping the page or affecting the paper's natural texture.
General Information
This article is provided as general information only to help customers compare and choose POSCA markers, acrylic markers, art supplies, creative tools and related products. Product details, colours, finishes, surface suitability, availability, pricing and usage results may vary. Always check the individual product page, manufacturer information, age guidance, surface instructions and safety recommendations before purchasing or using a product.