


Using POSCA Markers on Wood: The Ultimate Australian Artist’s Guide
Have you ever spent hours perfecting a detailed design only to watch the paint bleed into the timber grain like a spilled coffee on a napkin? It's a heartbreaking moment for any creator, yet it happens to almost everyone starting out with using posca markers on wood. While these acrylic paint markers are incredibly versatile, the natural thirst of timber can often turn crisp lines into feathered edges if you aren't prepared for the surface's unique challenges.
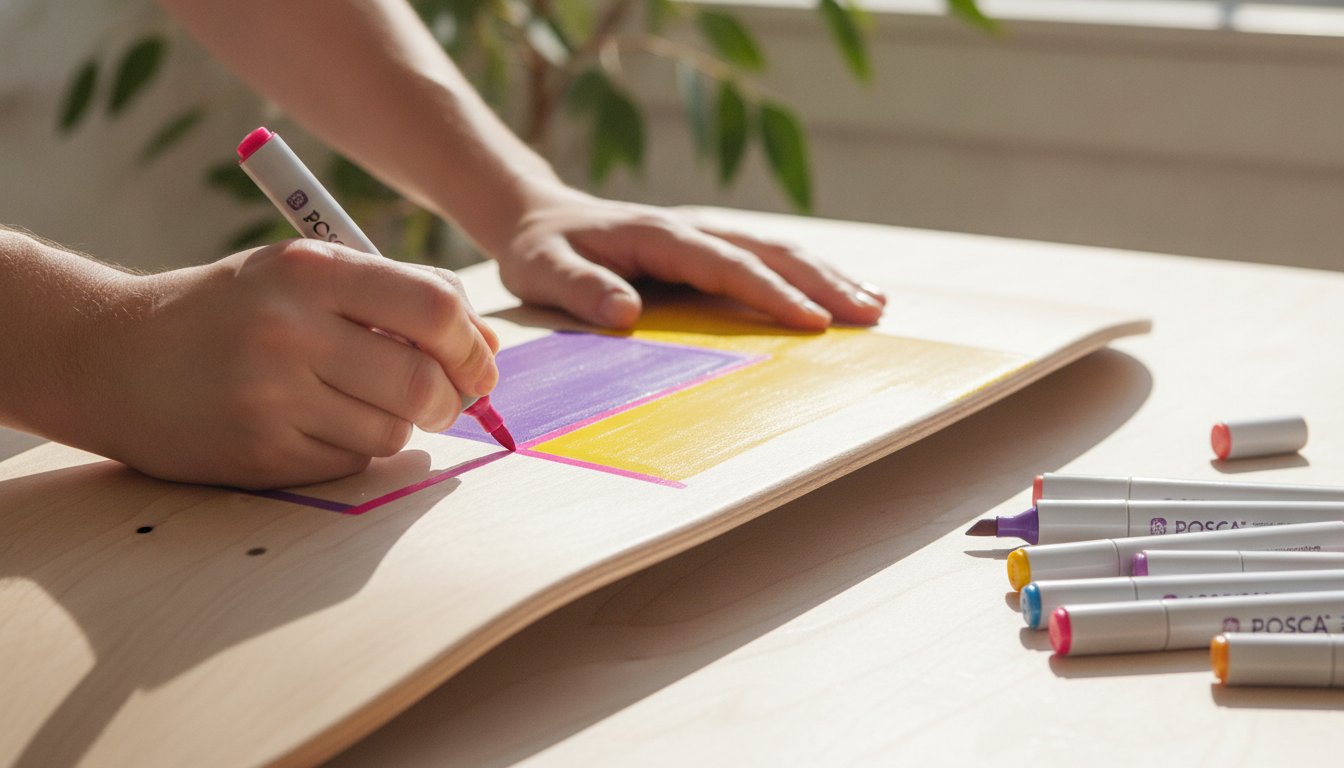
We know you want your colours to pop and your linework to stay sharp, whether you're customising a skateboard or creating a personalised gift. This guide will help you master your craft by sharing professional techniques for preparation, application, and sealing. We'll explore how to choose the right POSCA tip sizes for different wood textures and which varnishes provide that professional, permanent finish you're looking for. By the end of this guide, you'll have the confidence to turn any piece of timber into a vibrant masterpiece that lasts.
Key Takeaways
- Learn why sanding your timber to a high-grit finish is essential for protecting delicate marker nibs and achieving professional results.
- Discover why the PC-5M is the industry standard for timber and how the PC-17K can simplify large-scale murals and background coverage.
- Master the "Dry-Brush" technique to stop ink from feathering along the wood fibres and maintain crisp, vibrant linework.
- Understand the difference between water-based and solvent-based sealants to ensure your art remains permanent and moisture-resistant.
- Follow our specialist advice for using posca markers on wood to transform raw timber into a durable, colourful masterpiece.
The Essentials of Using POSCA Markers on Wood
A POSCA pen is essentially a high-quality Paint marker filled with water-based pigment ink. Unlike standard felt-tips, these markers behave like fluid acrylic paint, offering vibrant opacity that stands out beautifully against the organic tones of timber. This unique characteristic is why using posca markers on wood has become a staple technique in the Australian craft scene, which was valued at approximately AUD 10.61 million in 2025. Wood is a porous, living substrate that provides a tactile depth you simply can't get from paper or canvas.
Before you press the nib to the surface, you must consider the "thirst" of the timber. Raw wood is composed of thousands of tiny vascular tubes that naturally pull moisture inward. If you apply ink too heavily without understanding the grain direction, the paint will follow these fibres, causing the dreaded feathering effect. Mastering this interaction is the secret to achieving the crisp, professional lines that define high-end wood art.
To better understand how these markers interact with different timber surfaces, watch this helpful video:
Understanding Wood Absorbency and Texture
Different wood species react uniquely to acrylic ink. Softwoods like pine or cedar are highly porous and "drink" the ink quickly, which can dull the colour if you don't apply a second layer. Hardwoods such as oak or maple are much denser. They offer a smoother application but require more patience during the drying phase. If you're working with engineered materials like plywood or MDF, be aware that they lack a consistent grain and can swell if over-saturated with moisture. Always check for tannins in darker woods, as these natural oils can occasionally seep through lighter ink colours like white or pale yellow.
Treated vs. Untreated Timber: What You Need to Know
Identifying whether your wood is raw or treated is vital for both safety and success when using posca markers on wood. Raw, untreated timber is the ideal choice for POSCA markers because the pigment can bond directly with the wood fibres. If the wood feels slick or looks shiny, it likely has a factory varnish or wax finish that will prevent the paint from adhering. You'll need to sand these surfaces back to the natural grain before starting. From a safety perspective, avoid using CCA (Copper Chrome Arsenic) treated timber, which is often found in older Australian outdoor structures. Sanding these releases hazardous chemicals, so it's best to stick with clean, dressed timber from a reputable art or hardware supplier.
Preparing Your Wood Surface for Paint Pens
Successful wood art depends entirely on the work you do before the ink even touches the surface. While some creators might suggest you "just sand it a bit," professional results require a structured workflow to prevent ink bleeding and preserve your tools. When using posca markers on wood, your primary goal is to transform a rough, organic material into a predictable canvas. Skipping these steps often leads to feathered edges and ruined marker tips, which can be a costly mistake for any artist.
The Sanding Process: Protecting Your Nibs
Rough timber acts like sandpaper on the delicate felt tips of your markers. To prevent premature wear, you must sand the surface to a high-grit finish. Start with a 120-grit sandpaper to remove major imperfections, then progress to a 240-grit or higher for a silky-smooth result. Always sand in the direction of the grain. This prevents cross-grain scratches that trap ink and create messy, jagged lines. If you've already noticed your tips fraying on un-prepped timber, you might need to check out our replacement nibs to restore your marker's precision.
Once you've finished sanding, removing every speck of residual sawdust is vital. Even a tiny amount of dust can clog a marker's valve or contaminate the paint colour. Use a tack cloth or a slightly damp rag to wipe the surface clean, ensuring you reach into the natural grooves of the timber. Allow the wood to dry completely after wiping; any trapped moisture will cause the ink to spread uncontrollably.
Priming and Base Coating for Vibrancy
Deciding whether to prime your wood is a strategic choice based on your desired look. Priming is the barrier that prevents ink from sinking into wood fibres. If you want to keep the natural timber aesthetic, apply a thin coat of clear acrylic medium or clear gesso. This seals the pores while keeping the grain visible. For those wanting neon or pastel tones to look their best, a white acrylic base coat is the way to go. It provides a neutral, bright surface that reflects light back through the pigment. When considering your prep, it helps to ask the five important questions about painting wood to ensure your substrate is ready for a permanent finish.
Don't rush the process. Your timber must be bone-dry before the first marker stroke. Even if the surface feels dry, internal moisture can rise and interfere with the paint's adhesion. If you're unsure about the best preparation for a specific type of Australian timber, feel free to reach out to our creative support team for personalised advice on using posca markers on wood projects.
Selecting the Right POSCA Tips for Woodwork
Selecting the correct nib size is a strategic decision that directly impacts the quality of your finished piece. When using posca markers on wood, you need to match the marker's flow and tip durability to the scale of your project. The POSCA PC-5M Medium Bullet Tip is widely considered the industry standard for timber work. Its 2.5mm nib is versatile enough for both filling in shapes and creating bold outlines, and it's remarkably resilient against the natural friction of wood fibres.
For larger projects like timber murals or painting custom surfboards, the PC-17K Extra Broad Chisel Tip is indispensable. It allows you to cover massive surface areas quickly, ensuring a consistent coat of paint before the edges start to dry. Conversely, if you're working on smoother, tight-grained woods like Tasmanian Oak for small-scale jewellery, the PC-3M Fine Bullet Tip provides the precision needed for intricate patterns. For a more organic, painterly feel, the PCF-350 Brush Tip is excellent for creating staining effects or soft, sweeping strokes that mimic traditional brushwork. Scale matters when choosing your tools.
Fine Detail vs. Large Coverage
Matching your tool to the scale of your timber piece is essential. If you're customising small peg dolls or wooden beads, a fine tip like the PC-1M or PC-3M is your best bet. However, for wooden signage, chisel tips like the PC-8K are superior because they allow for consistent line weights in calligraphy and lettering. Investing in various POSCA marker sets is often the most practical way to ensure you have the right nib size for every stage of your project, from broad backgrounds to the final tiny highlights.
Layering and Blending on the Grain
Blending colours on wood requires a slightly different approach than on paper. Because wood is porous, the ink dries relatively fast, so you'll need to work quickly to blend two colours while they're still wet. This "wet-on-wet" technique works best on pre-primed timber where the ink sits on the surface longer. When using posca markers on wood that is particularly dark, expect to apply two or even three layers to achieve full opacity. Always wait for the paint to reach a "touch-dry" phase before adding outlines or fine details. This prevents the colours from bleeding into each other and keeps your linework crisp and professional.

Troubleshooting: Preventing Bleeding and Feathering
One of the most common frustrations when using posca markers on wood is watching a sharp line slowly blur into a fuzzy mess. This happens because of capillary action. Wood is essentially a bundle of microscopic straws designed to transport water. When you apply liquid ink, the timber naturally pulls that moisture along its vascular system. Understanding how to disrupt this process is the difference between a hobbyist project and a professional piece of art.
Why POSCA Markers Bleed on Wood
Bleeding is usually caused by excessive ink volume. If you pump the marker nib directly on the timber, you're flooding those vascular "straws" with more pigment than they can hold. This issue is often amplified by the Australian climate. In humid regions like Queensland or coastal New South Wales, the moisture in the air slows down the drying time of acrylic markers, giving the ink more opportunity to travel through the grain. Pay special attention to the "end grain" of your timber, such as the edges of a surfboard or the top of a fence post. These areas act like open straws and are the most prone to massive ink spread.
To combat this, we recommend the "Dry-Brush" technique. Instead of saturating the wood, apply very light, thin layers of colour. It's better to build up opacity with three quick passes than to risk a bleed with one heavy coat. This method allows the first layer to partially seal the fibres, creating a more stable surface for subsequent marker strokes.
Fixing Mistakes and Maintaining Nibs
If a bleed does occur, don't panic. You can often fix small errors on unsealed wood using a "sandpaper eraser" technique. Simply take a small piece of high-grit sandpaper and gently sand away the feathered ink once it's completely dry. For more precise corrections, a sharp craft knife can be used to carefully scrape the pigment off the surface fibres. Alternatively, you can use a white POSCA marker to "white out" small bleeds before reapplying your desired colour on top.
Your marker nibs will also face challenges from residual wood dust and stray fibres. If your marker starts to feel scratchy or the flow becomes inconsistent, the nib might be clogged. You can safely remove the nib and soak it in a small bowl of warm water to clear the obstruction. If the fibres have permanently shredded the felt, swapping in replacement nibs is a cost-effective way to restore your marker's precision without buying a whole new pen. Keeping your tools in top shape ensures that using posca markers on wood remains a smooth and enjoyable creative process. If you're struggling with a specific timber type or a stubborn clog, contact our creative mentors for expert troubleshooting advice.
How to Make POSCA Permanent on Wood
Sealing is the final, non-negotiable step for any artist using posca markers on wood. While the paint is water-resistant once dry, timber is an organic material that continues to breathe and react to its environment. Without a protective barrier, your artwork is vulnerable to moisture damage, fading, and accidental smudging. A proper seal locks the pigment into the wood fibres and ensures the colours remain as vibrant as the day you applied them.
You generally have two choices for sealants: water-based or solvent-based varnishes. Water-based acrylic varnishes are a safe, low-odour option that won't yellow over time. However, you must be careful during application. If you apply a water-based varnish too heavily or with too much friction, you risk "reactivating" the POSCA ink and causing your design to smear. Solvent-based varnishes provide a very durable finish but often require better ventilation and can occasionally slightly darken the natural tone of the timber.
Choosing the Right Varnish: Spray vs. Brush-on
For your first coat, aerosol spray varnishes are the gold standard. A light misting allows you to set the ink without physically touching the surface with a brush, which effectively eliminates the risk of smearing. Once that initial spray layer has cured and created a "shield," you can follow up with a brush-on varnish if you prefer a thicker, more tactile finish. Whether you choose a matte, satin, or gloss finish depends on the texture of your timber; matte finishes often suit raw, rustic wood, while gloss can make colours appear deeper and more saturated. For a broader look at how different materials react to sealants, you can check our POSCA Surface Guide for general principles.
Curing and Maintenance for Longevity
Patience is vital when finishing your project. There is a significant difference between the paint being "touch-dry" and being fully cured. We recommend waiting at least 24 hours after using posca markers on wood before applying your first coat of sealant. This ensures that every layer of pigment, especially in areas where you have used heavy layering, is bone-dry. UV-resistant varnish is essential for protecting POSCA pigment from the harsh Australian sun. This is particularly important for wooden pieces displayed in sun-drenched rooms or near windows, as high UV exposure can eventually bleach even the most high-quality pigments.
Maintaining your finished piece is straightforward once it is properly sealed. You can clean the surface using a soft, slightly damp microfibre cloth to remove dust. Avoid using harsh chemical cleaners or abrasive sponges, as these can gradually wear down the varnish and eventually reach the paint layer. With the right preparation and a professional seal, your timber creations will remain a permanent part of your collection for years to come.
Bring Your Timber Creations to Life
Bringing your creative vision to life on timber is a rewarding process that combines natural textures with vibrant, modern colour. Success with using posca markers on wood comes down to respecting the material's organic nature through careful sanding and strategic sealing. By choosing the right nib size for your scale and building up opacity with thin, dry-brush layers, you can achieve professional results that stand the test of time. For creators who love the intricate details of miniature world-building, KreativeWall.com offers creative scene stickers that can beautifully complement your hand-painted timber projects.
As an Australian family-owned specialist, PoscART is dedicated to supporting your artistic journey. We carry an extensive range of all 66+ POSCA colours to ensure you always have the perfect shade for every highlight and shadow. Whether you're a professional designer or a hobbyist starting your first piece of wood art, we pride ourselves on providing expert advice specifically for Australian artists working in our unique climate. For those looking to explore new creative avenues, you can check out Face Painting Course Online to develop your skills in a different artistic medium.
If you have questions about specific timber types or need help selecting the right supplies for your next masterpiece, reach out to our friendly team at PoscART today. We are always happy to help you get the most out of your markers. We can't wait to see what you create!
Frequently Asked Questions
Do I need to prime wood before using POSCA markers?
Priming isn't mandatory, but it's highly recommended for the best results when using posca markers on wood. Raw timber is naturally porous and will absorb the pigment, which can often dull the colour or cause feathering. Applying a clear acrylic medium or a white gesso base creates a vital barrier that keeps the ink on the surface, ensuring your designs remain bright and sharp.
How do I stop my POSCA pens from bleeding on raw timber?
To stop bleeding, you must control both the ink volume and the surface texture. Sand the wood to at least a 240-grit finish to close the vascular fibres as much as possible. Instead of pumping the marker nib directly on your project, prime the marker on a scrap piece of paper first. Apply the paint in light, thin layers to prevent capillary action from pulling the ink sideways through the grain.
Can I use POSCA markers on treated pine or outdoor wood?
You can use these markers on treated wood, but you should proceed with caution. Many outdoor timbers, like CCA-treated pine, contain hazardous chemicals that shouldn't be sanded or kept indoors. Additionally, factory-treated wood often has a waxy or water-repellent finish that prevents the paint from sticking. Always sand back to the raw grain for the best adhesion and safety.
What is the best way to seal POSCA markers on wood for outdoor use?
The best method for outdoor protection involves a multi-step sealing process. Start with two light coats of a UV-resistant aerosol spray varnish to set the ink without smearing. Once that has cured, apply a more robust, weather-proof exterior varnish. This protects your artwork from the harsh Australian sun and prevents moisture from seeping into the timber fibres over time.
Will POSCA markers ruin my wood if I make a mistake?
Mistakes don't have to ruin your project because the paint sits primarily on the surface. If the wood is unsealed, you can use a small piece of fine sandpaper to "erase" the error once the ink is dry. For sealed surfaces, a slightly damp cloth can often wipe away wet ink. You can also use a white marker to cover the mistake before repainting your design.
Can I use POSCA pencils with markers on a wood project?
Yes, POSCA pencils are a fantastic addition to any wood project. They are specifically designed to work alongside the markers, allowing you to add soft shading, fine textures, or detailed highlights over the dried acrylic paint. This combination is excellent for creating realistic portraits or complex landscapes on timber surfaces where you want a mix of bold colour and delicate detail.
Why is my POSCA marker nib getting fuzzy when I draw on wood?
Your marker nib is becoming fuzzy because the rough wood fibres are acting like sandpaper on the felt. This usually happens on timber that hasn't been sanded sufficiently before you began. To prevent this, ensure your surface is sanded to a high-grit finish and try to use a lighter touch when drawing. If the nib is already shredded, you can easily swap it for a replacement nib.
Are POSCA markers food-safe for wooden spoons or cheese boards?
POSCA markers are not food-safe and should not be used on surfaces that come into direct contact with food. While the ink is non-toxic and water-based, it isn't designed to withstand the heat of a dishwasher or the friction of cutlery. Use them for the handles of wooden spoons or the decorative edges of cheese boards, but keep all food-contact areas raw or finished with food-grade oil.
General Information
This article is provided as general information only to help customers compare and choose POSCA markers, acrylic markers, art supplies, creative tools and related products. Product details, colours, finishes, surface suitability, availability, pricing and usage results may vary. Always check the individual product page, manufacturer information, age guidance, surface instructions and safety recommendations before purchasing or using a product.